How to set up OpenVPN on Ubuntu from desktop
Go step-by-step through following instructions to set up OpenVPN on Ubuntu.
Install network-manager-openvpn plugin
-
Open terminal: click the Menu button and write Terminal (1) in order to access it.

-
When the Terminal is accessed, type the following:
sudo apt-get install network-manager-openvpn
and press Enter

-
You will be informed about the package installation and will be asked if you want to continue.
Type Y and press Enter to proceed.

Configure the OpenVPN connection
-
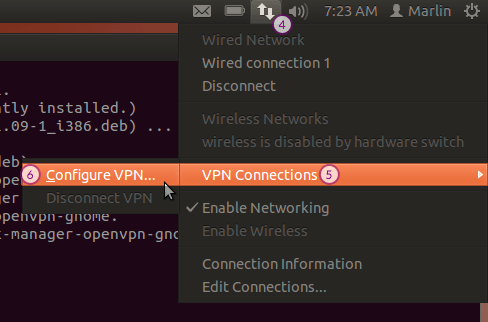
Click Network Manager (4) > VPN Connections (5) > Configure VPN (6).
-
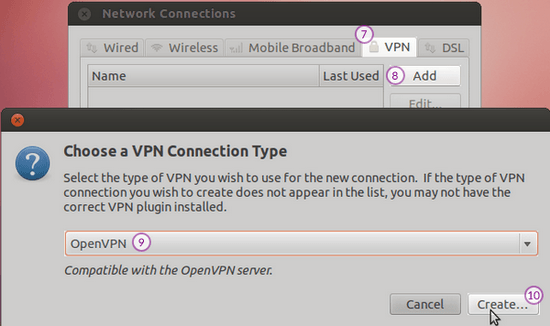
In Network Connections window, select the VPN tab (7) and press the Add button (8).
In the Choose a VPN Connection Type (9) window select OpenVPN and press the Create… button (10).
-
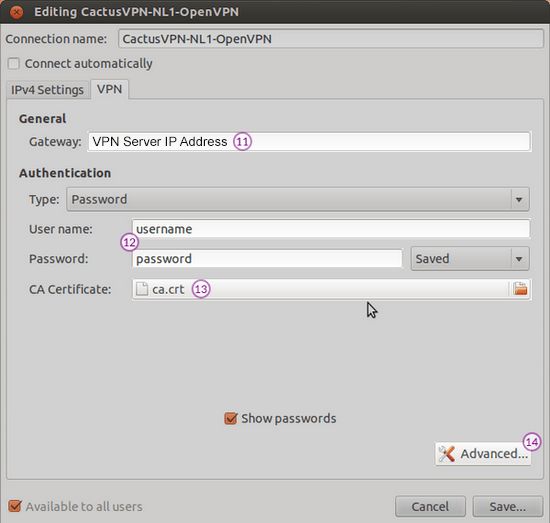
Complete requested fields, using your data:
The VPN server IP address (11) and your VPN account credentials (12).
You can find IP addresses of all our servers in your account on our website, by going to Settings.
You can find your VPN username and password in your account on our website, by going to Settings -> VPN Username & Password. Make sure you use your VPN username and password and NOT the website account credentials (What is the difference?).
Download the OpenVPN Certificate Authority file.
Select the downloaded openvpn-configs_ca.crt file (13).
Click on Advanced button (14).
-
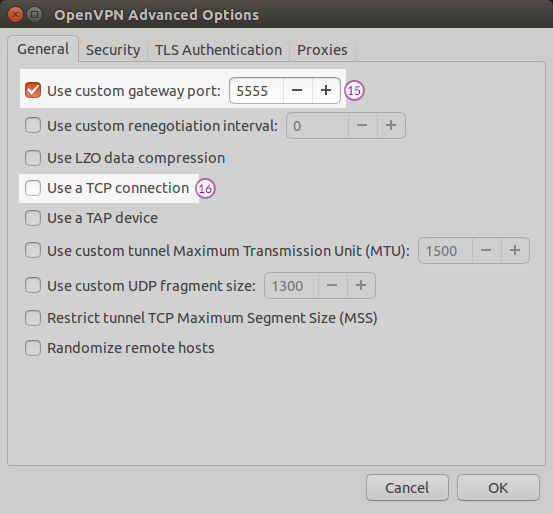
To use a UDP connection, type the 5555, 992 or 1194 value for the Use custom gateway port field (15).
To use a TCP connection, check the Use a TCP connection checkbox (16) and type the 443, 5555, 992 or 1194 value for the Use custom gateway port field (15).
Now OpenVPN on Ubuntu is set up.
Connect to your new OpenVPN connection from CactusVPN
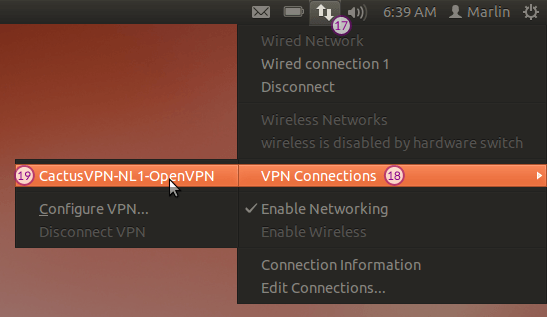
Network Manager (17) > VPN Connections (18) > Your CactusVPN connection (19):
Popular tutorials like this
VPN and Smart DNS Services
Protect online privacy, secure your connection and access blocked websites
Try CactusVPN For Free