How to set up OpenVPN on Windows 8
In this tutorial we will show you how to set up OpenVPN on Windows 8 but first let’s see what are our requirements and recommendations.
Requirements
In order to set up the OpenVPN you will need:
- A CactusVPN account. If you don’t have one you can try our services for free.
- Your VPN username and password. You can find them in your account on our website, by going to Settings -> VPN Username & Password.
- The OpenVPN configuration files. You can find them on the Downloads page on our website.
- The OpenVPN GUI. You can download it from here for free.
Recommendations
- To skip the manual setup and for more features we recommend to use the CactusVPN App for Windows.
If you still want to set up OpenVPN manually, go step-by-step through following instructions:
OpenVPN Setup instructions
In order to manually set up the VPN, you should first install OpenVPN GUI. Once that’s done, you will be able to install OpenVPN on Windows 8. You can download it from here for free.
Once the download is complete, simply install the software like below:
Please click on “Next”.

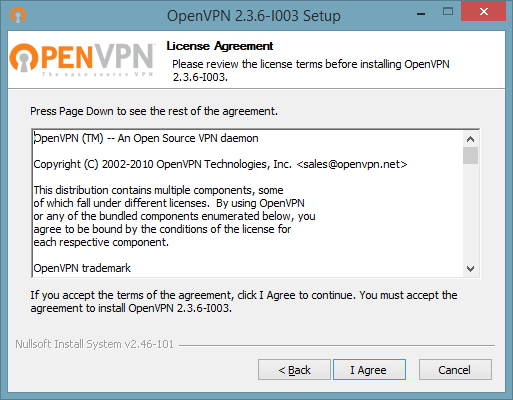
- To continue the installation, please click on “I agree”.
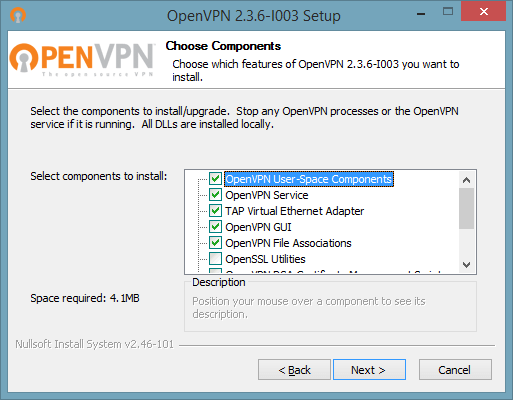
- You should now click on “Next”.
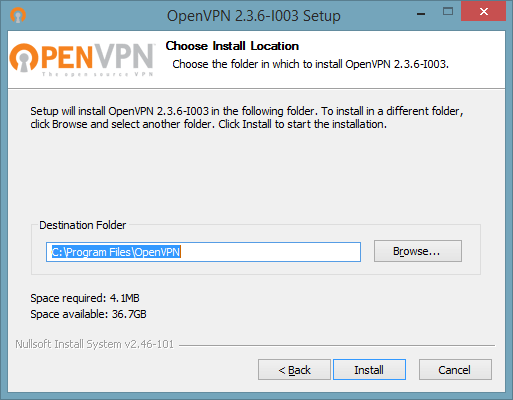
- Click the “Install” button.
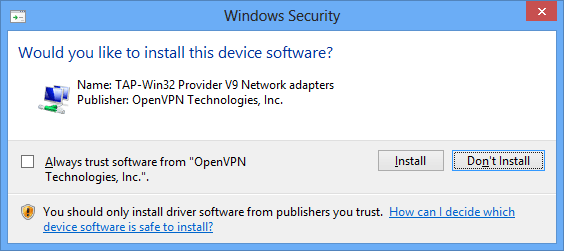
- You may see the message below depending on your Windows Security settings. If you do, please click on “Install” to start the process.
- Click the “Next” button.
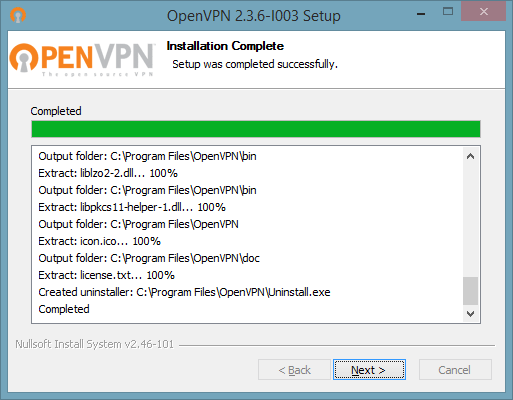
- Click the “Finish” button, in order to stop the Install Wizard.

- Now you need to download the config files and unzip the downloaded file.
Copy the files you need to the OpenVPN config folder. Normally you’ll find it in the following path: C:\Program Files\OpenVPN\config.
If you receive an error about privileges, then move zip archive to C:\ folder, extract and move back to C:\Program Files\OpenVPN\config\ folder.
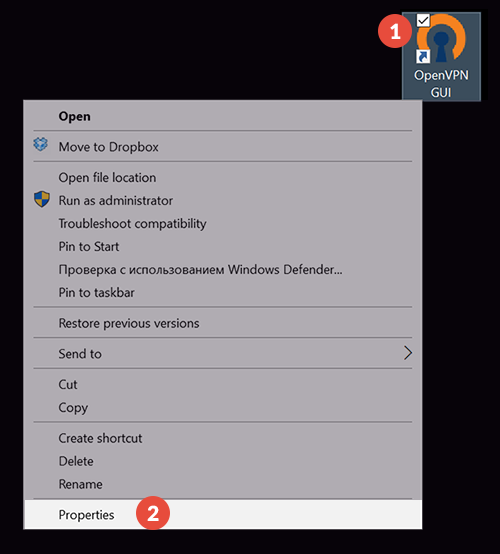
- Go to the OpenVPN icon (1) from your desktop, right-click on it and select “Properties” (2).
- Click on the “Advanced” button (3).
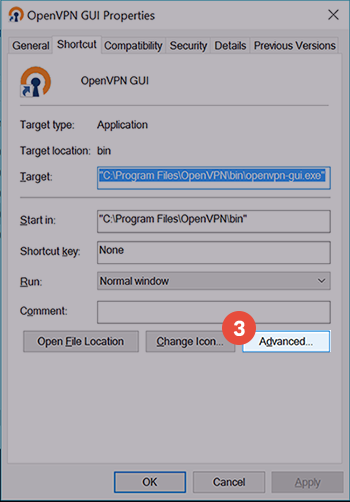
- In the following dialog box check the “Run as administrator” checkbox (4) and click on “OK” (5).
 Once this setting is saved, your PC will always run OpenVPN Gui with administrator privileges if you use the desktop icon to launch it. (You’ll be notified by UAC if you have it enabled).
 - Now, in the system tray, you should see a symbol for OpenVPN. Right click on the symbol, choose the server you want to connect to and click “Connect”. You will find two different protocols you can choose from for OpenVPN: TCP and UDP. UDP is usually the faster one so we therefore recommend you to try it first.
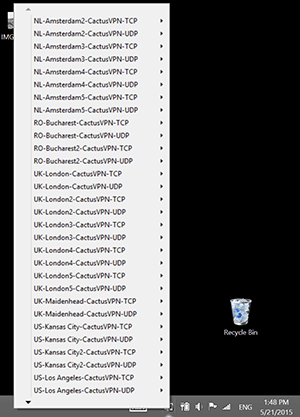
In order to disconnect, you just need to right click on the OpenVPN server you were connected to and select Disconnect.
Popular tutorials like this
VPN and Smart DNS Services
Protect online privacy, secure your connection and access blocked websites
Try CactusVPN For Free