How to set up SSTP VPN on Windows 10
In this tutorial we will show you how to set up SSTP VPN on Windows 10 but first let’s see what are our requirements and recommendations.
Requirements
In order to set up the SSTP VPN you will need:
- A CactusVPN account. If you don’t have one you can try our services for free.
- Your VPN username, password and VPN server address. You can find them in your account on our website, by going to Settings.
Recommendations
To skip the manual setup and for more features we recommend to use the CactusVPN App for Windows.
If you still want to set up SSTP VPN manually, go step-by-step through following instructions:
SSTP VPN Setup Instructions
-
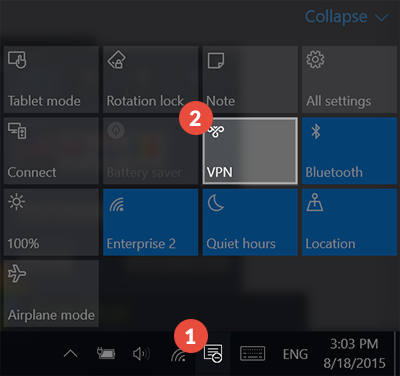
From the lower right corner click on Action Center icon (1).
Then press on VPN (2).
-
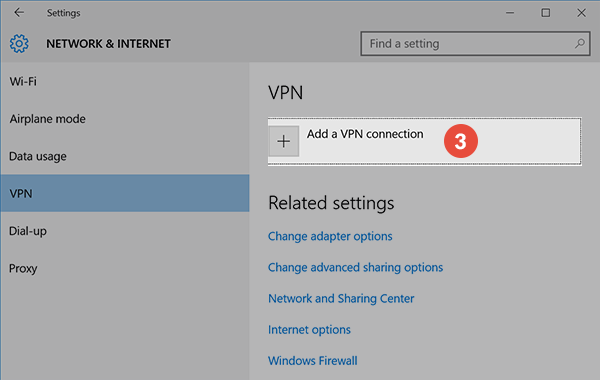
This will open Network & Internet settings window. Click on Add a VPN connection (3).
On the next page fill the fields with the following settings:
VPN provider (4) – Select Windows (built-in).
Connection name (5) – Give a memorable name to this connection. For example name it CactusVPN SSTP.
Server name or address (6) – enter the SSTP hostname of the CactusVPN server you want to connect to.
You can find IP addresses of all our servers in your account on our website, by going to Settings.
VPN type (7) – select Secure Socket Tunneling Protocol (SSTP).
Type of sign-in info (8) – select User name and password.
In the User name (9) and Password (10) fields type your VPN username and password.
You can find your VPN username and password in your account on our website, by going to Settings -> VPN Username & Password. Make sure you use your VPN username and password and NOT the website account credentials (What is the difference?).
Check all selected data once again and press Save (11).

-
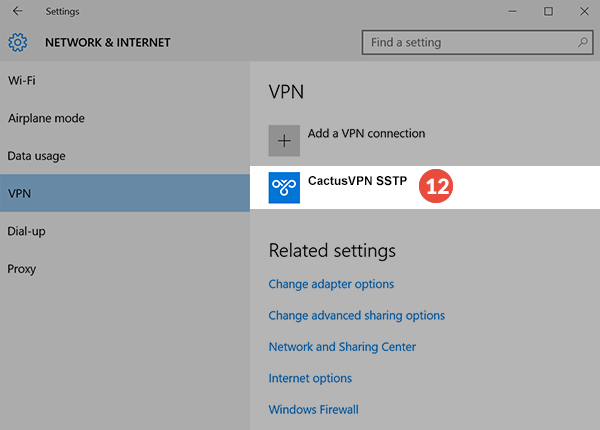
Now you can see your VPN connection (12) was created.
-
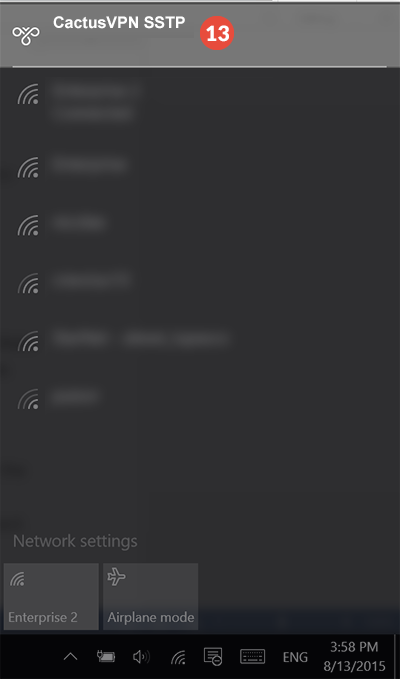
To connect to SSTP protocol click ok Network icon (Wi-Fi or wired) and click on the desired VPN connection (13).
-
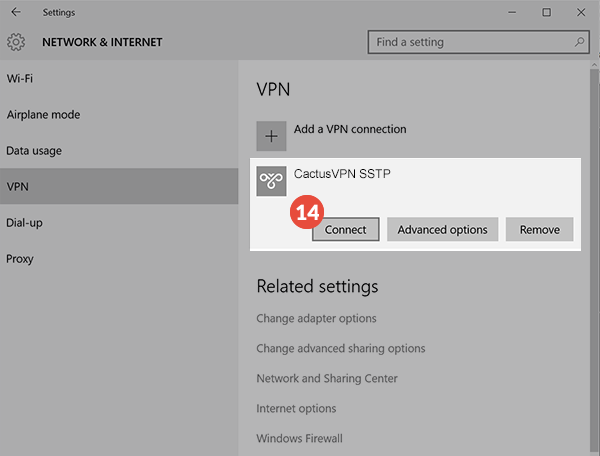
This will open your Network and Internet settings. Click on desired VPN connection and press on Connect button (14).
Popular tutorials like this
VPN and Smart DNS Services
Protect online privacy, secure your connection and access blocked websites
Try CactusVPN For Free