How to set up WireGuard on OpenWrt from Terminal (on macOS/Linux)
In this tutorial we will show you how to set up WireGuard® VPN on OpenWrt from Terminal on macOS or Linux but first let’s see what are our requirements and recommendations.
Requirements
In order to set up WireGuard you will need:
- A CactusVPN account. If you don’t have one you can try our services for free.
- The Open SSH Client.
Installing packages
-
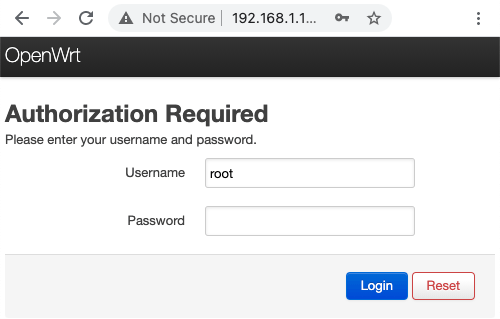
Connect to the LuCI administration interface through the browser of your choice. Usually its address is 192.168.1.1.

-
Go to System > Software from the menu bar.

-
Type luci-proto-wireguard in the Download and install package field and click on OK to install WireGuard and all the necessary dependencies.

Click Install to approve the luci-proto-wireguard package install.

-
Type luci-app-wireguard in the Download and install package field to manage WireGuard using LuCI.

Click Install to approve the luci-app-wireguard package install.

Choose the VPN server
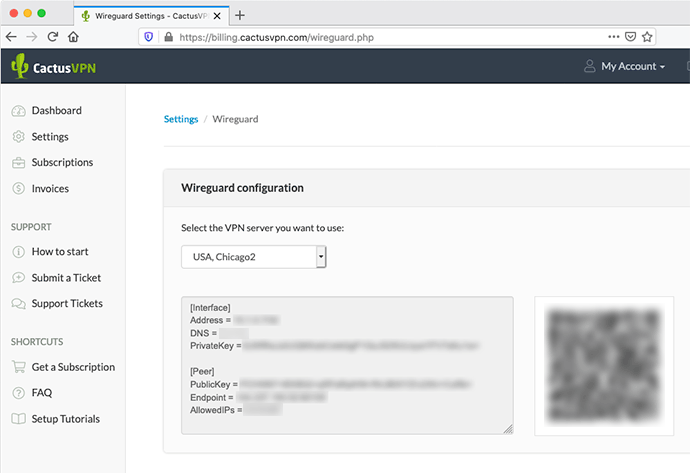
Sign in to your account on our website and go to Settings -> WireGuard Configs.
Select the VPN server you want to connect to.
In the field below, you will get the Wireguard configuration for the selected server. Copy the content of the field, you will need it at step 5.

Important! Keep the PrivateKey a closely guarded secret, do not share it with anyone, and do not post it on the Internet.
Creating the keys
-
Connect to the router by typing in a console ssh [email protected]
Type yes to continue connecting and type the password.
-
Create the client’s private key file by running:
vi wgclient.key
Press i inside the editor to start editing it.
Copy the PrivateKey (for example aE56kmTB9rUvi4JaIK73oSDGJfnQKZY5sd5jhKLd632=) and paste it into the file.
Press the ESC button, write :wq then press Enter in order to write and quit the file.
-
Create the server’s public key file by running:
vi wgserver.pub
Press i inside the editor to start editing it.
Copy the PublicKey (for example YZt2XhiI+qRFaRpCHW67+lEKHPQN+RroRkUBX+CBI/v=) and paste it into the file.
Press the ESC button, write :wq then press Enter in order to write and quit the file.
Installing packages and specifying the VPN client configuration parameters
To install the packages run:
opkg update
opkg install wireguard
To configure the parameters run:
WG_IF=”vpn”
WG_SERV=”Endpoint IP(without port)”
WG_PORT=”60100″
WG_ADDR=”Address of the Interface”
Key Management
To exchange the keys between the server and the client run:
WG_KEY=”$(cat wgclient.key)”
WG_PUB=”$(cat wgserver.pub)”
Firewall setup
Consider the VPN network as public and assign VPN interface to WAN zone to minimize firewall setup.
To configure the firewall run:
uci rename firewall.@zone[0]=”lan”
uci rename firewall.@zone[1]=”wan”
uci del_list firewall.wan.network=”${WG_IF}”
uci add_list firewall.wan.network=”${WG_IF}”
uci commit firewall
/etc/init.d/firewall restart
Set up VPN interface and peers
To configure the network run:
uci -q delete network.${WG_IF}
uci set network.${WG_IF}=”interface”
uci set network.${WG_IF}.proto=”wireguard”
uci set network.${WG_IF}.private_key=”${WG_KEY}”
uci add_list network.${WG_IF}.addresses=”${WG_ADDR}”
To add VPN peers run:
uci -q delete network.wgserver
uci set network.wgserver=”wireguard_${WG_IF}”
uci set network.wgserver.public_key=”${WG_PUB}”
uci set network.wgserver.endpoint_host=”${WG_SERV}”
uci set network.wgserver.endpoint_port=”${WG_PORT}”
uci set network.wgserver.route_allowed_ips=”1″
uci add_list network.wgserver.allowed_ips=”0.0.0.0/0″
uci commit network
/etc/init.d/network restart
Once the network will restart you will be connected to the VPN server.
Monitoring connection status
Run wg show command to monitor any WireGuard connection.
To disconnect from VPN you can run these commands:
ifdown wg0
uci set network.wg0.auto=”0″
uci commit network
/etc/init.d/network restart
VPN and Smart DNS Services
Protect online privacy, secure your connection and access blocked websites
Try CactusVPN For Free