Here’s the Best Way to Test VPN Connections

Want to test VPN connections to make sure everything is running as it should but not sure where to start?
No worries – we’ve put this guide together to show you exactly what VPN tests you should run to check your connections, and how to do it as well.
Table of contents
- “Why Do I Need to Test My VPN Connection Anyway?”
- How to Test VPN Connections for Leaks
- How to Test VPNs for Malware Infections
- How to Test VPN Encryption
- The Smart Way to Test VPN Connections when Torrenting
- How to Test VPN Connection Speeds
- “What If I Use CactusVPN and I Notice a Connection Problem?”
We’ll be using our own VPN service for these tests, and we’ll use various tools to check the following:
- If there are any IP (both IPv4 and IPv6) leaks.
- If there are any DNS leaks.
- Whether or not WebRTC leaks are an issue.
- If the encryption is working as it should.
- How the connection speed is holding up.
- If any info is leaked when torrenting.
- If malware infections are a problem.
“Why Do I Need to Test My VPN Connection Anyway?”
To make sure you’re getting your money’s worth, for one. If the VPN you’re using is leaking sensitive info, that’s not really a good deal for you, right?
It’s also a good idea to test VPN connections to make sure you’re safe when you’re on the Internet. After all, some VPN providers have been found to leak user info through WebRTC bugs, for example.
And that’s not all – a team of ethical hackers showed how 3 popular VPN providers are leaking user info, and The Best VPN tested 74 VPN providers and found that 15 of them were exposing users to IP, DNS, and/or WebRTC leaks.
Don’t forget – data leaks shouldn’t be taken lightly! Even something as simple as an IP can offer a hacker info about your city and ZIP code. In fact, some skilled hackers could ping your IP, try to map any open ports they find, and use said ports to access your device.
How to Test VPN Connections for Leaks
For reference, we will be using CactusVPN Poland-based VPN server to test our VPN connections for leaks. Our real addresses (IP and DNS) are Romanian in this case.
IP Address Leaks
An IP address leak happens when you’re using a VPN, but a website can still detect your real IP address. If that happens, it means the VPN you’re using is not working as it should. It also means that cybercriminals could potentially see your real IP, and use it to find out personal details about you. After all, an IP leak would expose info like:
- Your real IP address.
- The country you are from.
- The city you are from.
- What ISP you are using.
Now, the best way to start is to use our own IP leak test tool. It’s a quick way of finding out if the VPN you are using is doing its job or not.
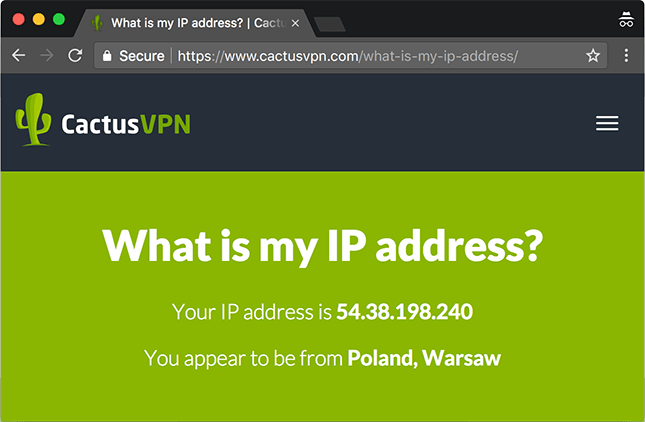
You can also use WhatIsMyIPAddress, which is an IP leak tool similar to ours.
IPLEAK.NET is another tool you can use. Normally, it offers much more information than just IP addresses, but for now let’s focus on just this. Besides IPv4 leak tests, the tool should also perform IPv6 leak tests.
The next tool you can try out is the BrowserLeaks tool. Besides checking for IPv4 leaks, it will also check for DNS leaks and IPv6 leaks. In our case, there were no IPv6 results since we disabled IPv6 beforehand.
IPv6-Specific Tools
If you’re not sure what IPv6 is, it stands for Internet Protocol version 6. It’s the successor to IPv4 (the standard IP address format – like the ones you see in our screenshots), and – like it – it assigns Internet-connected devices an identifier.
Having your IPv6 leaked means your IP address is made public, putting your privacy at risk.
Some of the previous tools we used look for IPv6 leaks too, but In case you’re only interested in running IPv6 leak tests, you can try out the IPv6 Leak Test which is a pretty straightforward tool.
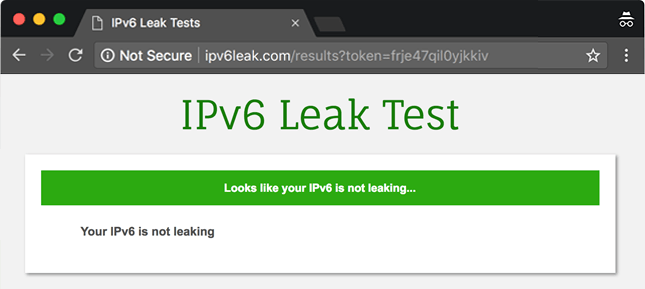
If you’re using a VPN with IPv6 support, and the tool tells you your IPv6 is leaking, your best bet is to switch to a different provider. You can also just disable IPv6 instead.
Remember to Do a VPN Test During the Reconnection Phase Too
The tools mentioned above can be used to test VPN connections when they are active. However, you should also simulate interruptions to see if the VPN handles connectivity issues well.
Here’s how you can do that:
- While connected to the VPN, disconnect from the Internet.
- After the connection has dropped, reconnect to the web, and open multiple tabs with IP leak test tools (you can also have them opened before disconnecting from the Internet).
- Refresh each tab as fast as possible while the VPN connection is re-established.
- Once you’re again connected to the VPN, stop refreshing the tabs.
- Check all the test results to see if your real IP address shows up. If it does, that means the VPN you are using leaks IP data when reconnecting.
Still, it’s worth mentioning that in the case of connectivity issues, there is a pretty big chance that an IP leak could occur. The best way to keep your privacy intact in this scenario is to use a VPN that has a Killswitch – a feature that automatically disconnects you from the web if there are any connectivity issues to a VPN server to make sure you’re not exposed when you’re online.
One Thing to Keep in Mind about IP Leak Tools
These tools can have different databases they use to run IP leak tests. As a result, there is sometimes a chance that the IP they show you is from a different location – regardless of whether or not their database is up-to-date.
This has happened when we tried to use IP X to check for IP leaks. Even though the results displayed the IP of our Poland server, the tool said our server was based in France – even though that isn’t true.
In this case, you should mostly just pay attention to the IP that is displayed. As long as it’s the address of the VPN server you are connected to, and your own IP is hidden, the VPN service is working as intended even though the tool might show you a different geo-location.
DNS Leaks
If you want to make sure your VPN connection is safe and sound, you need to ensure your DNS isn’t leaked.
What is DNS?
DNS stands for Domain Name System, and it’s responsible for translating domain names (website addresses, basically) into IP addresses.
Why is that important? Well, for one, your DNS contains info that can be linked to your geo-location. And while DNS leaks might not expose your exact IP address, they can expose the location of your ISP, and some hackers could use that data to track down your own IP address.
Also, DNS requests are usually text logs that show all the websites you visit. Your ISP can easily monitor those logs, record any info they want, and – depending on where you live – share it with the authorities for up to a certain number of years, or outright sell it to advertisers.
Now, to test a VPN connection for DNS leaks, you can start out by using the DNSLeakTest tool. You can either run a Standard or an Extended test. We recommend doing both. If any details in the results match those of your ISP, you’re the victim of a DNS leak.
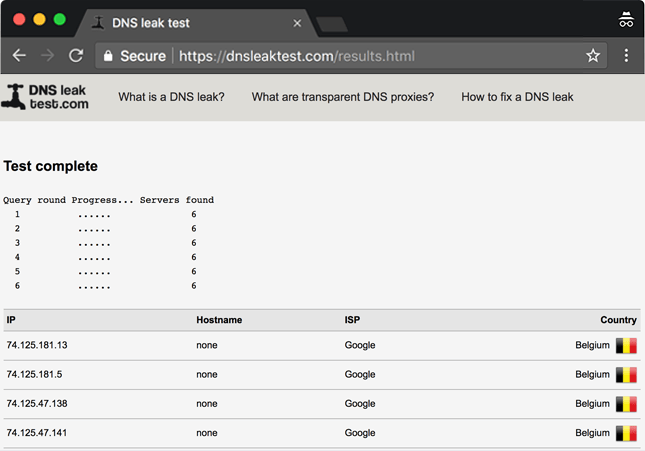
Besides that, you can also use Comparitech’s DNS leak test tool. First, you need to run a test without using a VPN, so that the tool can gather relevant data, and then run another test while being connected to a VPN. The tool will cross-check the new info against the previous data, and give you the results.
You can also try using the IP leak test tools we discussed above, as most of them check for DNS leaks too.
Ideally, you should always use a VPN that offers DNS leak protection.
WebRTC Leaks
If you’re not familiar with WebRTC, it’s an API definition that’s used by web browsers like Opera, Chrome, and Firefox. It makes it possible for you to have audio/video calls and enjoy P2P sharing within a web browser without having to install dozens of plugins or extensions.
As good as that sounds, there’s just one problem – WebRTC leaks can occur, and when that happens, your IP is pretty much leaked out through WebRTC.
You can scan your VPN connection for WebRTC leaks by using BrowserLeaks’ WebRTC Leak Test tool. If you see your IP address in the results, that means you’re dealing with a WebRTC leak.
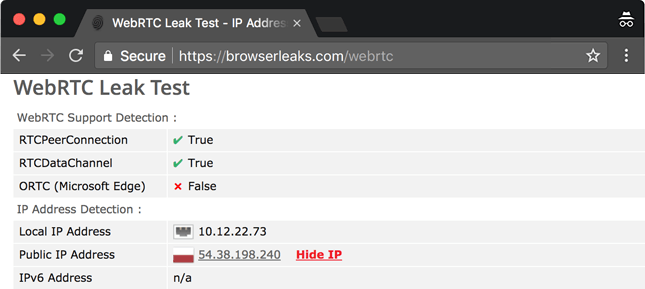
To run more tests, you can also use:
In case you are worried about WebRTC leaks even if you get good results, you can always turn WebRTC off in your browser. But if you want to avoid that hassle, you can also just install uBlock Origin on your browser. Once that’s done, open the Dashboard, go to the “Privacy” tab, and select the “Prevent WebRTC from leaking local IP addresses” option.
How to Test VPNs for Malware Infections
“Do I really need to test VPN connections for malware?”
Well, it’s better to be safe than sorry. Plus, it’s not a secret that some VPN apps – especially free ones – have been found to contain malware.
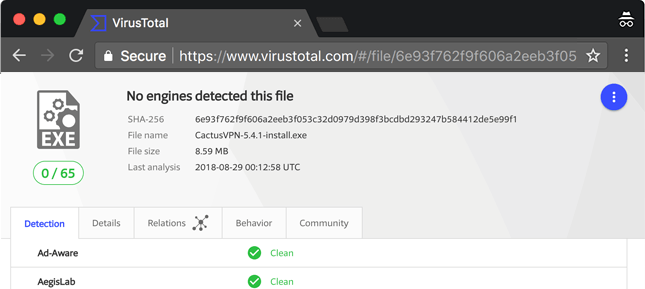
One way to test a VPN client or VPN files for malware is to upload them to VirusTotal. The platform will use dozens of antivirus scans to see if there are any problems with them.
It also helps to have proper anti-malware software installed on your device – like Malwarebytes and ESET, for instance. The software will alert you when you download a malicious file. You can run a scan of your device when you download a VPN client to see if there are any problems as well.
How to Test VPN Encryption
If you’re using a VPN to protect your personal data when you’re on the Internet, you should definitely test the service to see if it’s really securing your traffic and info. After all, free VPNs have been found to have poorly-configured encryption protocols, so it’s better to know you’re safe.
One way to do that is to use Wireshark – a tool that can verify a VPN’s encryption status. Here’s exactly what you have to do:
- Open the VPN while running Wireshark.
- Choose a network interface to record (WiFi or Ethernet).
- Start recording.
- Select the “Protocol” as “OpenVPN,” or any other protocol you are using.
- Right-click on the OpenVPN packet, and follow a UDP or TCP stream.
- If the whole stream shows up as gibberish, that means the encryption is working well.
You can also try using Glasswire. You just install it, run the VPN, and browse the web for a while and download some data. Next, go to the Usage tab, and check the App section. Look for your VPN, and see what encryption status is displayed.
The Smart Way to Test VPN Connections when Torrenting
If you need to torrent something, it’s obviously better to do it with a VPN – both to avoid getting into legal trouble and to make sure your IP isn’t leaked to other people downloading the same file(s).
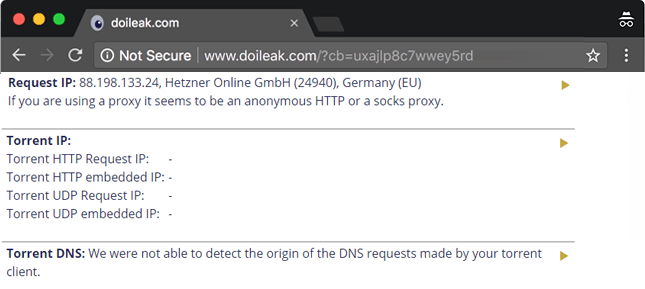
Also, before we move on, we should also add that – for this tests – we used our Germany server since our Poland server doesn’t support P2P.
Now, the fastest way to check if your IP is leaked through torrents is with IPMagnet. The best way to use this tool is to access the link with your real IP address, then run your VPN, and add the Magnet link to your torrenting client. Then, just keep your eyes on the IPMagnet page. If your real IP shows up instead of your VPN IP, it means your address is being leaked.
And to prove that is our own server’s IP address, we will also be using DoILeak to run another test. Make sure you click “Activate additional Torrent Tests” and that you add the Magnet link to your torrenting client before going ahead with the tests.
How to Test VPN Connection Speeds
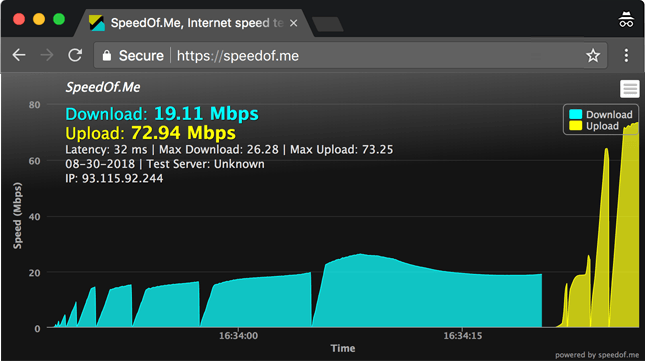
Besides checking how reliable and secure a VPN connection is, you might also be interested to test your VPN connection speed. Doing that is pretty straightforward – you can start by using this tool: Speedof.me.
Other tools you can use include:
7 Factors That Affects Your VPN’s Connection Speed
While a VPN provider might offer high-speed servers, it’s important to keep in mind the speed can sometimes vary depending on the following 7 factors:
- How far your physical location is from the server.
- What regional bandwidth restrictions are in place.
- How powerful your CPU is.
- If the server you are using is overcrowded or not.
- What connection speed your ISP provides you with.
- Whether or not your firewall interferes with your VPN or CPU.
- What kind of encryption your VPN uses.
In case you’d like to know more about this topic, feel free to check out our comprehensive guide.
“What If I Use CactusVPN and I Notice a Connection Problem?”
If you think any of your data has been leaked, you should immediately submit a support ticket with our 24/7 customer care team.
You Shouldn’t Really Encounter Any Problems, Though
For one, our VPN comes equipped with complete DNS Leak Protection – you just have to turn it on before connecting to one of our servers.
And while all our servers offer high speed and unlimited bandwidth, you can also choose one of 6 VPN protocols to use when accessing the web so that you can tweak your online speeds to a certain degree. Speaking of encryption, you’ll be happy to know we use the best there is – high-end AES encryption!
Besides that, we should also mention that CactusVPN features a Killswitch, so your IP won’t be exposed even for a second if a connectivity issue occurs since the Killswitch will cut your Internet connection to keep you safe.
You can also use our Apps Killer to choose which application should be automatically closed if your VPN connection goes down (pretty useful for torrenting if you don’t want to use a Killswitch).
Special Deal! Get CactusVPN for $3.5/mo!
And once you do become a CactusVPN customer, we’ll still have your back with a 30-day money-back guarantee.
Conclusion
It’s always a good idea to double or triple-check your VPN connection to make sure everything is working as it should. The tests we showcased in this article should offer you enough info about your VPN connection, so that you can relax and not have to worry about any leaks or other issues endangering your privacy.
And in case you know of other testing tools that are worth trying out, feel free to let all of us know in the comment section.


